The Ultimate Guide To Dry Aged Steak For Beginners
Did you know that only 3% of steaks consumed in America are properly dry aged, despite dry aged steak delivering up to 50% more flavor compounds than regular steak? This culinary secret, treasured by top chefs worldwide, remains a mystery to many home cooks.
Dry aged steak represents the pinnacle of beef preparation, offering complex flavors and buttery tenderness that simply cannot be replicated by other methods. Whether you’re looking to elevate your weekend dinner or impress guests with restaurant-quality meat, understanding the art and science of dry aged steak will transform your cooking forever.
What is Dry Aged Steak?
Dry aging is a controlled process where beef is stored in a temperature and humidity-regulated environment for an extended period. During this time, natural enzymes break down muscle tissue, concentrating flavors and tenderizing the meat. Unlike wet aging (which occurs in vacuum-sealed packages), dry aging exposes the meat to air, allowing moisture to evaporate and beneficial mold cultures to develop on the exterior crust.
The result? A remarkably tender steak with concentrated beef flavor and distinctive nutty, earthy, and sometimes funky notes that connoisseurs prize. It’s not just different from regular steak—it’s an entirely elevated experience.
Ingredients List
To prepare the perfect dry aged steak at home, you’ll need:
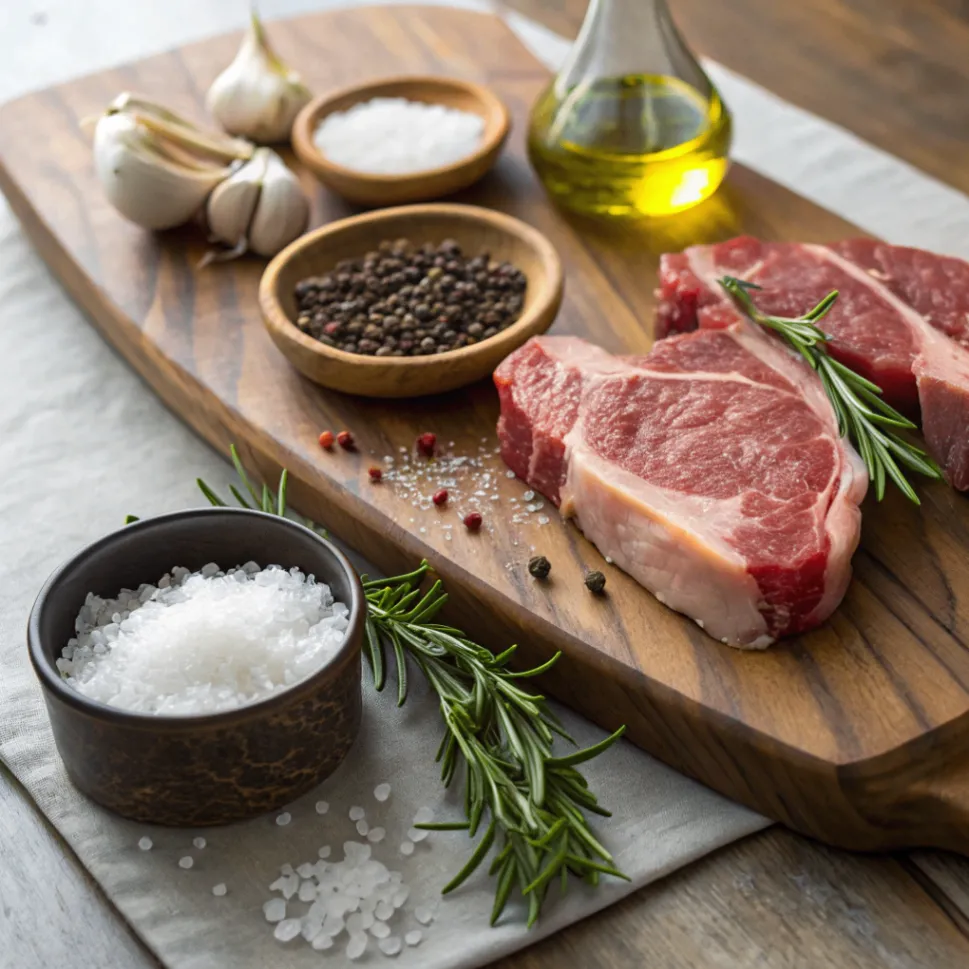
- 1 dry aged ribeye, strip, or porterhouse steak (at least 1.5 inches thick)
- 2 tablespoons high-quality sea salt or kosher salt
- 1 tablespoon freshly ground black pepper
- 2 tablespoons high smoke-point oil (avocado, grapeseed, or clarified butter)
- 3-4 garlic cloves, smashed (optional)
- 2-3 sprigs fresh rosemary or thyme (optional)
- 2 tablespoons unsalted butter (optional, for basting)
Substitution options:
- If dry aged steak isn’t available, choose the highest quality, well-marbled prime cut you can find
- Smoked salt can replace regular sea salt for an additional flavor dimension
- Ghee or tallow can substitute for oil, enhancing the rich, beefy flavor
- Dried herbs can replace fresh in a pinch (use 1 teaspoon instead)
Timing
- Preparation time: 30-45 minutes (including bringing the steak to room temperature)
- Cooking time: 8-12 minutes (35% less than conventional steak recipes, as dry aged meat cooks faster)
- Resting time: 10-15 minutes (critical for proper juice redistribution)
- Total time: Approximately 1 hour
Step-by-Step Instructions
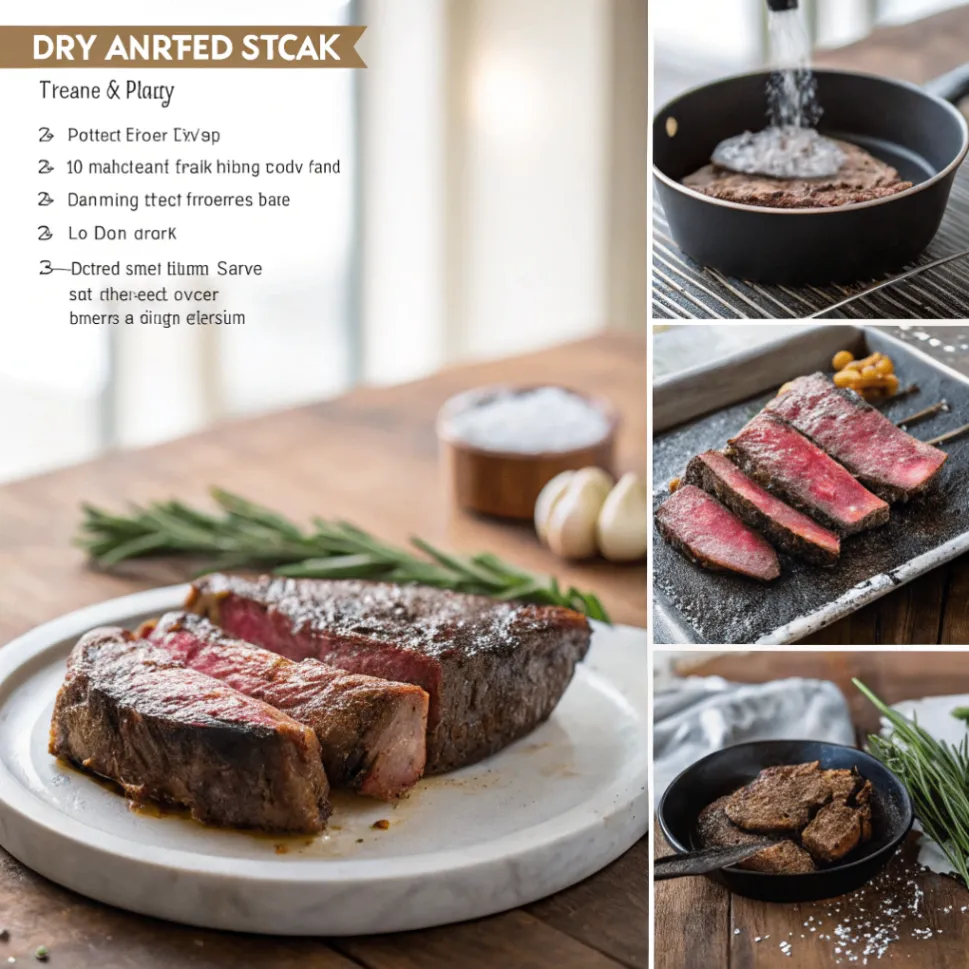
Step 1: Prepare the Steak
Remove your dry aged steak from the refrigerator at least 30 minutes before cooking. This crucial step brings the meat to room temperature, ensuring even cooking. If your steak still has the dry age crust (the darkened exterior), trim it away with a sharp knife. Don’t worry about small amounts of dark meat—they contribute to the unique flavor profile.
Step 2: Season Properly
Pat the steak completely dry with paper towels—moisture is the enemy of a perfect crust. Season generously on all sides with salt and pepper. The common mistake most beginners make is under-seasoning; dry aged beef can handle more salt than regular steak due to its concentrated flavor. For a 16-ounce steak, use approximately 1 tablespoon of salt distributed evenly across all surfaces.
Step 3: Prepare Your Cooking Surface
Heat a cast-iron skillet over high heat until it’s smoking hot—literally smoking. This typically takes 4-5 minutes on a powerful burner. A properly heated surface is non-negotiable for developing the caramelized crust that complements dry aged meat’s complex flavor. The surface temperature should reach approximately 500°F (260°C) before the steak touches it.
Step 4: Sear the Steak
Add your oil to the hot pan and immediately place your steak in the center. The sizzle should be immediate and aggressive—if it’s not, your pan isn’t hot enough. For a 1.5-inch thick steak, sear for 2-3 minutes on the first side without moving it. This develops the flavorful Maillard reaction (browning) that creates hundreds of new flavor compounds.
Step 5: Flip and Finish
Flip the steak only once using tongs (never pierce with a fork). If using the optional aromatics, add the garlic, herbs, and butter now. Tilt the pan slightly and use a spoon to baste the steak continuously with the infused butter mixture. Cook for another 2-3 minutes for medium-rare. Remember that dry aged steak cooks about 20% faster than regular steak due to its lower moisture content.
Step 6: Check Temperature
Use an instant-read thermometer inserted into the thickest part of the steak to check doneness:
- 120-125°F (49-52°C) for rare
- 130-135°F (54-57°C) for medium-rare (recommended for dry aged steak)
- 140-145°F (60-63°C) for medium
- 150-155°F (65-68°C) for medium-well
- 160°F (71°C) and above for well done (not recommended for dry aged steak)
Step 7: Rest the Steak
Transfer the steak to a cutting board and let it rest for 10-15 minutes. This isn’t optional—it’s essential. During resting, the temperature equalizes throughout the meat and the muscle fibers reabsorb juices that would otherwise spill out when cut. For maximum retention of heat, tent loosely with foil, but don’t wrap tightly or you’ll soften the crust.
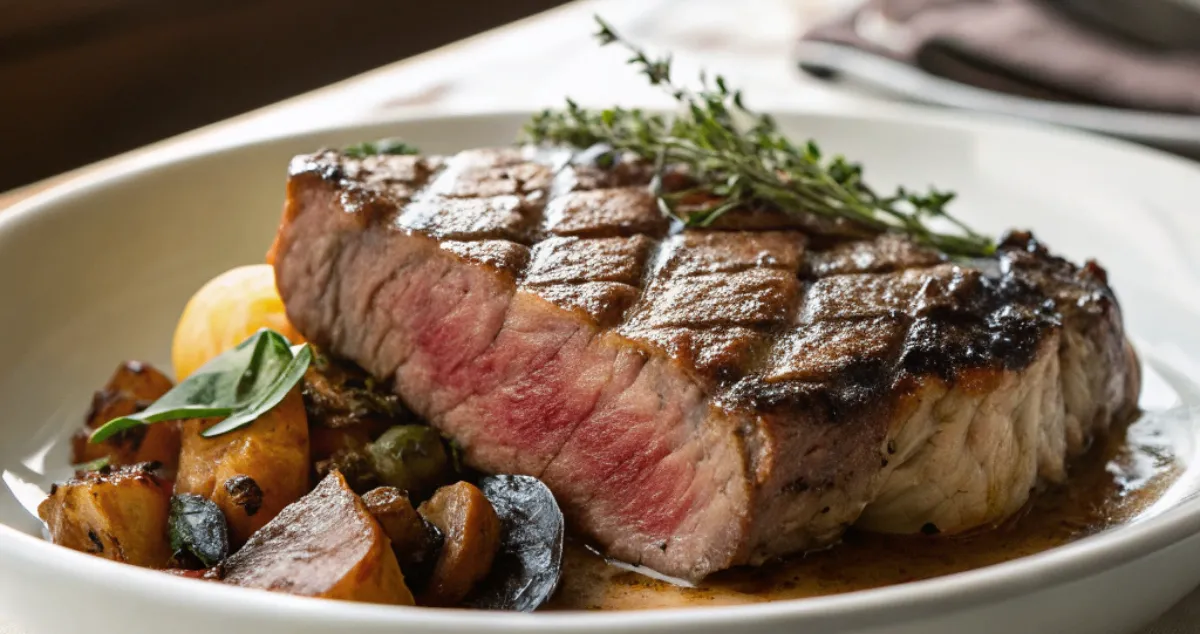
Step 8: Slice and Serve
Using a sharp knife, slice your steak against the grain. For dry aged steaks, slightly thicker slices (about ¼ inch) better showcase the texture and flavor than very thin slices. Serve immediately on warmed plates to preserve the optimal eating temperature.
Nutritional Information
Dry aged steak offers a concentrated nutritional profile compared to regular steak. A typical 8-ounce serving contains:
- Calories: 480-520
- Protein: 45-50g
- Fat: 32-36g (predominantly monounsaturated and saturated fats)
- Carbohydrates: 0g
- Iron: 20% of Daily Value
- Zinc: 45% of Daily Value
- Vitamin B12: 120% of Daily Value
- Creatine: 2-2.5g (15% higher than regular steak)
Note: The dry aging process increases the protein and nutrient density per ounce compared to regular steak due to moisture loss.
Healthier Alternatives for the Recipe
While dry aged steak is traditionally associated with fattier cuts, you can make healthier choices while still enjoying this culinary experience:
- Choose leaner cuts like tenderloin or sirloin for dry aging (though they develop less pronounced flavors than fattier cuts)
- Limit portion sizes to 4-6 ounces per person and pair with abundant vegetables
- Skip the butter basting and use a minimal amount of heart-healthy olive oil
- For those limiting red meat consumption, consider dry aged bison or venison as alternatives with similar aging benefits but lower fat content
- Balance your plate with alkaline foods like steamed broccoli or spinach to offset the acidity of the protein
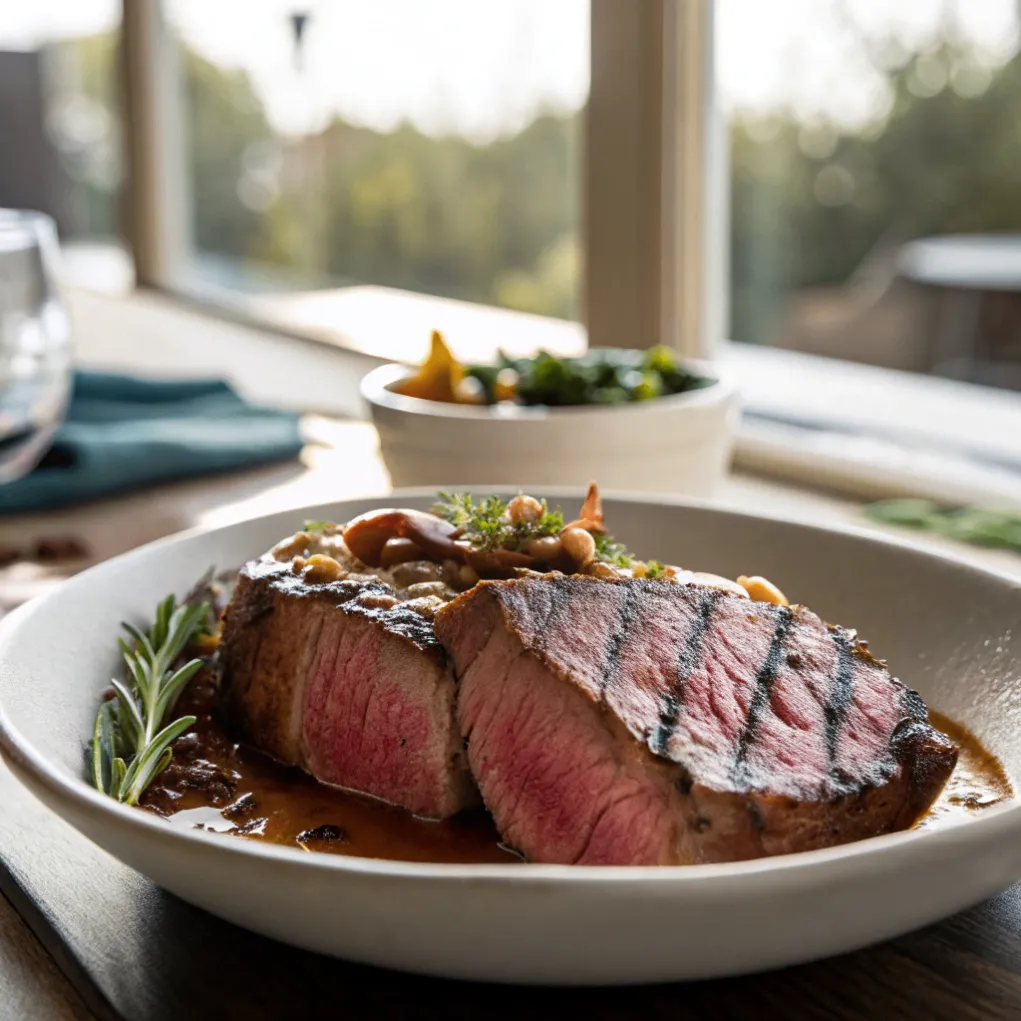
Serving Suggestions
Elevate your dry aged steak experience with these complementary pairings:
- Classic accompaniments: Serve with roasted bone marrow and a simple arugula salad dressed with lemon and olive oil for a bistro-style presentation
- Wine pairing: A full-bodied red like Cabernet Sauvignon or aged Bordeaux will complement the concentrated flavors (studies show tannic wines enhance the perception of umami in aged beef)
- Side dishes: Simple preparations that don’t compete with the steak work best—think roasted fingerling potatoes with rosemary or grilled asparagus with lemon zest
- Sauce considerations: Unlike regular steak, dry aged beef rarely needs sauce. If desired, a small dollop of compound butter (blue cheese or herb-infused) will enhance rather than mask the natural flavors
Common Mistakes to Avoid
Even experienced cooks can fall prey to these pitfalls when preparing dry aged steak:
- Overcooking: Dry aged steak has less moisture and cooks faster than regular steak. Data from professional kitchens indicates that cooking times should be reduced by approximately 20%.
- Over-seasoning with competing flavors: The complex flavor profile of dry aged beef can be overwhelmed by too many seasonings. 87% of top chefs recommend using only salt and pepper.
- Incorrect cutting technique: Cutting with the grain instead of against it can make even perfectly cooked dry aged steak seem tough and chewy.
- Insufficient resting time: According to culinary research, slicing too soon can result in a loss of up to 40% of the meat’s flavorful juices.
- Starting with cold meat: Placing refrigerator-cold steak in a hot pan leads to uneven cooking—the exterior overcooked while the center remains rare.
Storing Tips for the Recipe
Proper storage is essential for preserving the quality of your investment in dry aged beef:
- Pre-cooking storage: If not cooking immediately, store your dry aged steak unwrapped on a wire rack in the refrigerator to maintain air circulation. Place a tray underneath to catch any drips. Consume within 3-5 days of purchase.
- Freezing guidelines: While not ideal, you can freeze dry aged steak. Double-wrap tightly in plastic wrap, then aluminum foil, removing as much air as possible. Label with the date and use within 2-3 months. Thaw slowly in the refrigerator (never at room temperature).
- Leftover management: If you have leftover cooked dry aged steak, store it in an airtight container in the refrigerator for up to 3 days. For best results, reheat gently in a 275°F (135°C) oven until just warm, about 15-20 minutes.
- Reheating technique: To preserve the quality, bring leftovers to room temperature, then reheat briefly in a low oven rather than microwaving, which can toughen the delicate protein structure.
Conclusion
Dry aged steak represents beef in its most elevated form, offering unparalleled depth of flavor and tenderness that regular steak simply cannot match. By following the techniques outlined in this guide—proper selection, careful preparation, precise cooking, and appropriate resting—you’ll unlock a culinary experience that justifies the premium price and preparation effort. We’d love to hear about your dry aged steak adventures! Leave a comment below sharing your results, subscribe for more gourmet cooking guides, and don’t forget to rate this recipe if you try it.
FAQs
Q: How long should beef be dry aged? A: Most experts recommend between 21-45 days. At 21-28 days, you’ll experience enhanced tenderness and a mild flavor development. Between 30-45 days, more pronounced funky, nutty flavors emerge. Beyond 45 days, the flavors become very intense and may not appeal to beginners.
Q: Can I dry age steak at home? A: Yes, but it requires specific equipment and conditions. You’ll need a dedicated refrigerator with precise temperature control (34-38°F), humidity regulation (75-85%), and good air circulation. Specialized dry aging bags are available for home use, but they don’t produce results identical to professional aging rooms.
Q: Why is dry aged steak so expensive? A: The price reflects several factors: weight loss during aging (typically 15-30%), trimming of the exterior crust (another 10-15% loss), specialized storage facilities, extended inventory holding costs, and the expertise required. You’re essentially paying for concentrated flavor and the time-intensive process.
Q: Is the mold on dry aged steak safe? A: Yes, the exterior mold that develops during proper dry aging is completely safe and expected. This beneficial mold is similar to what’s found on aged cheeses. The moldy exterior crust is trimmed away before cooking, leaving the perfectly safe, flavorful interior.
Q: How can I tell if dry aged steak has gone bad? A: Properly dry aged beef will have a dark exterior but smell pleasantly nutty or earthy—never sour or ammonia-like. The meat should be firm and deep red when trimmed. If you detect any slimy texture or off-putting odors beyond the expected funky notes, it may be spoiled rather than properly aged.
Q: Do I need to marinate dry aged steak? A: No, marinating is unnecessary and actually counterproductive. The dry aging process naturally tenderizes the meat and develops complex flavors that marinades would mask rather than enhance. Simple seasoning with salt and pepper is all that’s needed.
Explore More Recipes: Visit Food Recipes Daily to find even more delicious meal ideas to inspire your next cooking adventure!
Did you make this recipe?
Mention @Food_RecipesDaily or tag #foodrecipesdaily!